With a black sky at 5 and the cold chill in the air my toddler and I have been busy making some fun things in the kitchen opposed to be outdoors. WARNING TO PARENTS: be prepared for a little mess. If you prefer mess free projects then don’t try these.
Ok you have been warned. Just be sure to prep the area you are creating in with linens, cardboard or paper to ensure an easier clean up.
Now let’s create some fun!
Can we build a snowman…
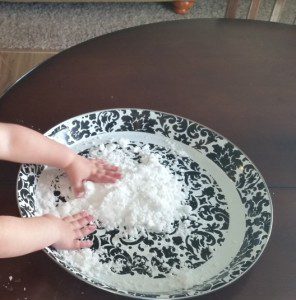
Make fake snow! When we have snow on the ground it is great sensory play to play with that too, however, snow melts and is cold on the hands. This snow lasts forever… well I made ours a month or so ago and it is still in mint condition.
- Hair conditioner (fragrant one is great but recommend white color unless you want colored snow)
- Baking Soda
- Mixing bowl
- Tray or dish with edge to help keep snow off the floor
Step 1: take 1 part conditioner and 3 parts baking soda mix together. Texture should be smooth and with using your hands be able to form a ball. If desired texture is not achieved at first continue to add more of either ingredient.
Step 2: dump the snow onto your tray and let the fun begin!
Homemade Playdough
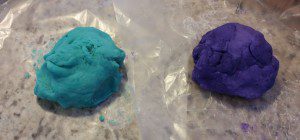
Great item to do for a birthday party treat bag or to give to friends over the holidays. I found little containers at the dollar store.This is a classic. I used to create this in my mom’s kitchen years ago. Yes, jars of playdough are inexpensive to buy at the store and we do have a bin full of them but the whole process of creating the dough it where my toddler was excited and I could see that excitement in her face. (Inspired by this recipe)
- 1 cup Flour
- 1 cup Water
- ¼ cup Salt
- 2 tsp. Cream of Tarter
- 1 Tbls. Vegtable Oil
- 4-6 drops Food coloring
- Sauce pan
- Containers or plastic baggies (ensure airtight)
- Waxed paper
Step 1: Mix all ingredients into your sauce pan and stir. My daughter had fun doing this part.
Step 2:Put pot on the stovetop and cook at medium heat. Mixture should start binding together.
Step 3: Remove from heat once the mixture is one large ball. Place on waxed paper and let cool
Step 4: Once cooled knead the dough until the texture is smooth and pliable.
Step 5: Ready to be played with or put into containers for storage.
Pinecone Bird Feeders
This brought me back to when I was young. Anyone else make these at school? Although this activity will eventually bring you outside to hang. The majority of work is all done inside.
- Pinecones
- Peanut Butter or if allergies substitute a nut free butter (just need something with substance that can act as the glue)
- Wild bird seed
- Twine or ribbon
Step 1: Find pinecones. If you have any pinecone trees in your yard or collect on a walk near a park. We were unsuccessful so for ours this year we used store bought.
Step 2: Tie twine or ribbon at the top of the pinecone and ensure it is secure for hanging.
Step 3: Spread peanut butter or nut free butter onto the pinecone. This is the messy part and may need the most assistance.
Step 4: Sprinkle bird seed over the freshly PB spread pinecone
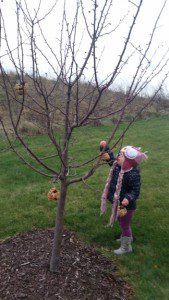
Step 5: Bundle up and head outside to hang your new birdfeeder
Homemade Crayons
Do you have broken crayons or did you buy cheap ones like I did at the dollar store that break easily? I first made these back 20+ years ago and was excited to show my daughter how to make. She had fun ripping off the paper and breaking any crayons that needed to be. These are great to repurpose for a new use of the old crayons or to give as a gift.
- Crayons
- Metal muffin tin, mini or regular depending on your preference, can also use a mold
Step 1: Take all the paper off the crayons and break any that need to be in order to fit inside your muffin tin or mold.
Step 2: Place crayons into the muffin tin. Go for crazy combinations or a solid color. My daughter mixed these up several times before choosing her color scheme.
Step 3: Bake in the oven at 300 degrees for 15-20 minutes (every oven is different) but once the crayons have fully melted you can remove from the oven.
Step 4: Let cool. I recommend waiting overnight to ensure the entire product is solidified.
What other fun indoor activities are you doing with your kids?


