Making your own nursing pads can be a fun, cheap and easy project. I wanted to make my own for several reasons:
- To save money.
- Store bought reusable nursing pads are terrible (expensive) flat circles that caused the infamous “saucer boob.” (You know when all you can see is two big white circles sticking out the front of your bra? Not cute.)
- I really wanted a contoured nursing pad that had some shape and fit better under my clothes.
- I was in a “make-something-with-the-sewing-machine” kind of mood.
- So I could sound hip and say that I made them because it’s better for the environment. It’s all the rage.
First we should start off with a disclaimer: I don’t really sew much. I am no Martha Stewart and frankly I can hardly thread my old sewing machine or wind the bobbin. I have to get the instructions out every time. Basically I don’t really know what i’m doing. But I can cut circles and sew them together and wear them where no one will see. Alright, now we are confident in my sewing skills we can move along!
These instructions will make around 14 pairs of nursing pads. Each pad I make has three layers of flannel and one layer of fleece.
Supplies:
- 2 yards of flannel (a 40% off coupon from JoAnn Fabric comes in handy here!)
- 1 yard of fleece
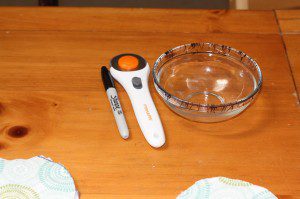
- something circular to trace circles with (I used a glass bowl that a 6 inch or so diameter). If you want larger pads use a larger circle to trace with.
- scissors or a fabric cutter thingy (not exactly sure of its real name). The fabric cutter thingy was worth its weight in gold. So much faster than cutting with scissors. Just be sure to use something under it like a fabric cutting mat to protect the table or your workspace. Of course most people who own a sewing machine probably already have these things.
- sewing machine
Before you start be sure to wash all fabric first.
To begin lay your fabric out and trace circles with your Sharpie. To save time fold your fabric in half before tracing circles. Try to trace as many circles on your fabric as possible. you will end up with a lot of fleece leftover. Each of my nursing pads had three layers of flannel and one layer of fleece for the back. Once all of your circles are traced, cut them all out with scissors or an awesome fabric cutting thingy.
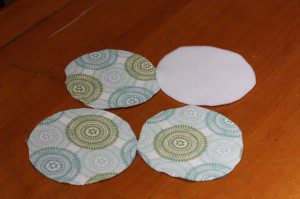
Once all your circles are cut, layer three pieces of flannel and one piece of fleece together. Make sure your pretty pattern is facing out (the flannel is the side that faces you and the fleece goes against the bra).
Here are my three flannel pieces and one fleece piece.
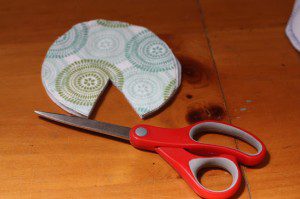
Once your circles have been layered together you are going to cut a pizza shape out of each stack. This will help to give the pad a contoured shape.
I kept the original piece of pizza shaped fabric as a guide for every other stack of circles so they each had the same sized slice cut out of them.
Pizza!
Once all your pizza pieces are cut out it’s time to whip out your circa 1962 sewing machine that your wonderful mother-in-law has permanently lent you and get to work.
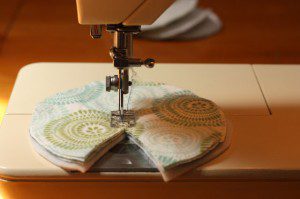
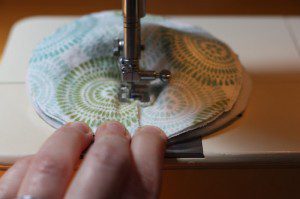
First you are going to sew together the pizza slice gap to give the nursing pad its contour shape.
Be careful to hold all the edges together so all the seams are closed through all 4 layers. Once you have stitched the first side be sure to flip it over to the fleece side and make sure the seam is closed completely. If not just stitch down the fleece side as well.
Contoured pizza!
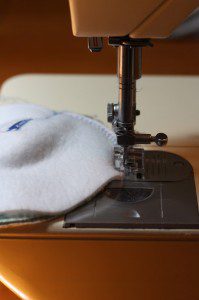
Lastly you serge the edges. I did the best I could since I don’t have an actual serger and heck, I don’t really know what a serger is! But anyway, sew around the edges to close it all together. If you have a serger, which is apparently a whole separate machine all together, it would be very handy. And if you are using your mother-in-laws circa 1962 sewing machine don’t waste 47 minutes reading through the instructions trying to figure out where a “serger” part is on your machine. It’s not there.
Look, I’m serging! Not really.
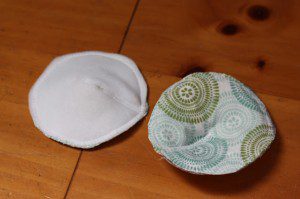
In the end you should en up with something like the pair below. You can see the fleece side and the flannel side and the stitching down the middle of them. Hopefully yours will look a little nicer than mine!
Look what I made, all by myself!
I made these nursing pads (and more) about 15 months ago. I loved them and never had to buy anymore disposable pads. Occasionally they would leak when my baby was younger when she would sleep for a long stretch at night, but other than that they were awesome and held up quite well through many washes. If you need more absorbency you could always add a layer of hemp or more flannel. Just be sure to choose a fabric that is breathable and absorbent. You would just have to be careful to make sure you can sew through all the layers you add.
To care for your nursing pads just wash and dry with your regular laundry. I always put mine in a lingerie bag so they didn’t get “lost” in the washer and dryer.
Easy peasy! If I can make nursing pads, anyone can. Have fun!




Very informative directions but mostly I wanted to tell you that you made me laugh out loud while reading about not knowing what a serger was anyways. Thanks for the comic relief!
I love that you have created a natural curve in the breast pad to fit your breast. The print on the outside is really cute.
I love these kinds of posts! I actually bought ones almost identical to these from an etsy shop except they aren’t curved. I love that these are curved!
Ha! This post was so me. I made these for my last pregnancy, and I probably could have written this whole thing myself. I didn’t have a serger either…didn’t even have a rotary cutter (big mistake that one), and I whipped them all up in an evening. Best baby project I did though!
are the materials you used ones that you are happy with?
My head is spinning with PUL,HUMP, COtton…
Thanks! Great Contoured shape. I’ve been sewing upcycled wool soakers for my upcoming little, now I have left over peices that are too small for anything too huge. Wool breast pads it is!