


Whether it is with your iPhone, point and shoot, or expensive camera that rarely leaves auto-mode, all of us moms want to take better pictures of our children. And let’s face it, while it is great to have professional pictures of your family taken (which I highly recommend at least once a year so you are in the pictures too), life gets in the way and that doesn’t always happen. When my first son was born almost three years ago, I made it my mission to focus on improving my photography skills so I would always have great memories of our time together. Here are a few tips and tricks I have picked up along the way to help you take better pictures of your kids during your everyday life (no matter what type of camera you are using).


1. Pay Attention to the Background: When you prepare to take a picture, I am sure you are focusing mostly on your subject. This makes complete sense. However, right before you hit the shutter, take a quick minute and look at what is behind your subject(s). Clutter can be a very distracting element to a picture. You want to try to keep your main focus on the subject, not the background. Are there any small changes you can make to your background to make it more visually appealing? Is there a pile of clothes you can move to the side? A stash of toys you can shove behind the couch quickly? You want your background to distract as little as possible from your main subject and sometimes simple changes can really help take your picture from blah to great in a very short period of time. You may even be able to change your position or angle just slightly to remove a distracting object from your photograph.
I took this picture of my son in his pajamas one morning using my iPhone. I just loved his little fuzzy head and jammies but wasn’t thinking about what was behind him on the first snap. However, after one quick look at the picture, I realized that the loads of (never-ending) laundry behind him weren’t helping the picture.

By simply moving the piles of laundry over a few inches the background improved dramatically.

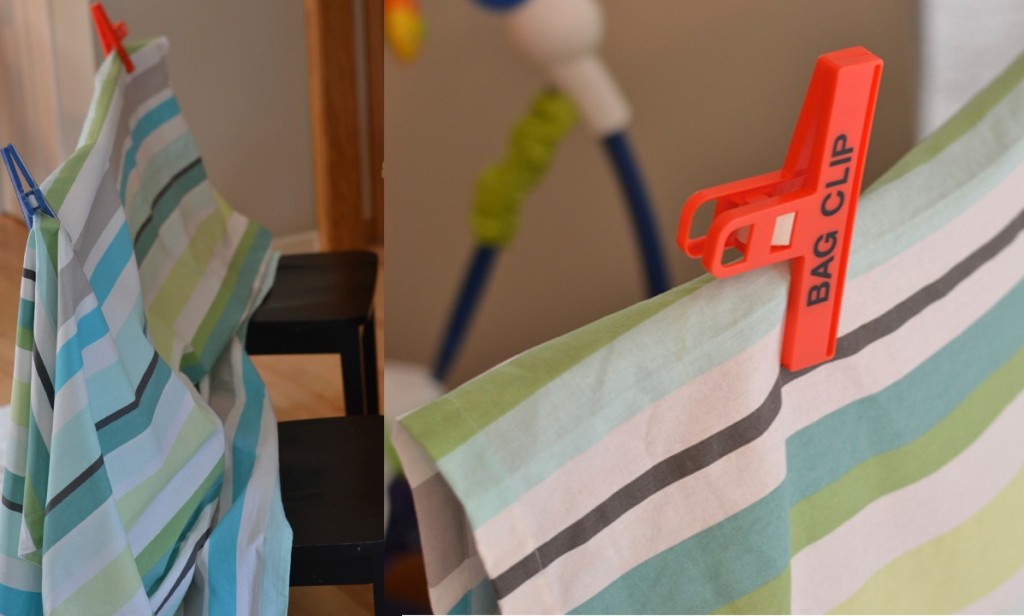
2. Get Creative With Your Backgrounds: While paying attention to the background behind your subject, there are also simple things you can do to make your own background that are surprisingly easy. While I love using natural backgrounds outside to photograph my children, the weather doesn’t cooperate a good chunk of the year, so I have found a few easy ways to get creative with your backgrounds. For example, try to think about some pretty blankets, bedspreads, or shower curtains you have around the house. Would any of these items make a good backdrop? You could position your subject behind your couch and drape a blanket over it or just use a large piece of fabric you love to make a backdrop.
I love the colors in the shower curtain in our boys’ bathroom. I decided it would make a colorful background for some updated pictures of my son. I simply took it down, moved some kitchen chairs to use to drape it over, snapped it in place with some bag clips (or you could use any type of clamps), laid a white blanket down on the floor and bam… I had a background ready to go in less then 10 minutes. I positioned it in front of our sliding glass windows in our kitchen for the best natural light and snapped away (see tip #4 – Find the Light).

Our master bedroom gets great light in the morning so for this picture I simply yanked up our comforter over the headboard to make it more of a backdrop. It took just a few seconds to do and I love how it showcases my son’s silly little face and bedhead!

This one was taken in the same morning light but in our guest bedroom where the comforter and wall is a good neutral backdrop.

3. Move Closer to Your Subject: Remember tip #1 – watching your background? One easy way to remove distracting or unappealing objects from your photo and bring the focus to your subject is by getting closer and filling your frame with your subject. When you are ready to snap your photo, take a few more steps closer to your subject. Yep, even closer. Try to fill your frame with your subject, not the background. This may take a little getting use to but I promise you will like some of the resulting pictures. Yes you may cut off or remove some parts of your subject from the picture but you will create a much more intimate picture.
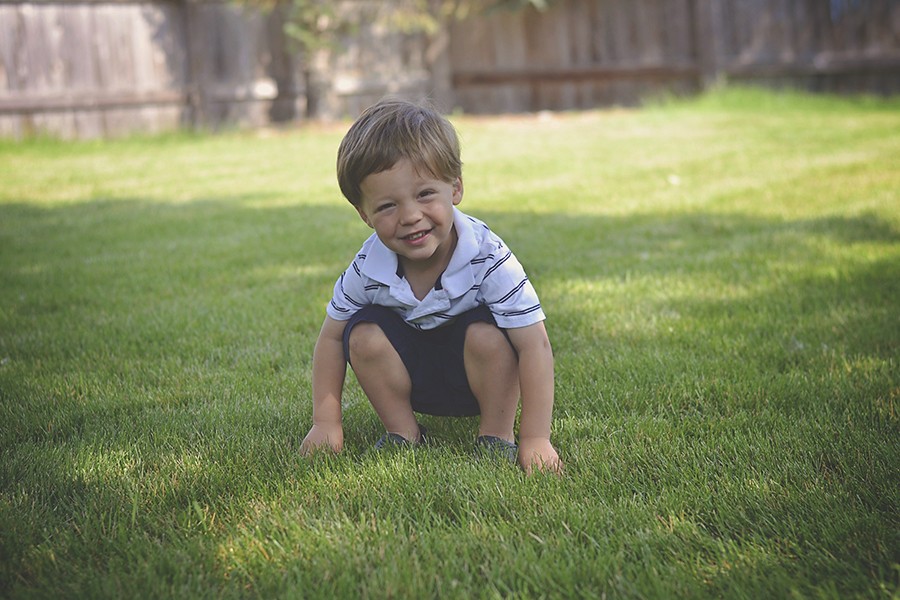
While the background in this picture (the fence in our backyard) isn’t distracting or terribly ugly, it doesn’t do much for the focus of my picture – my son. By stepping in a few steps and getting closer to my son, the picture instantly becomes more about my son and less about the fence in the background.

Moving in closer to your subject allows you to focus on the details as well. Not every picture you take of you children has to be standing and smiling at your camera (not like this is even possible most of the time). Instead, try to think outside of the box and focus on some of the other details that are equally important to capture. Think about ways to get creative with the shot you are taking and the story you are trying to tell.
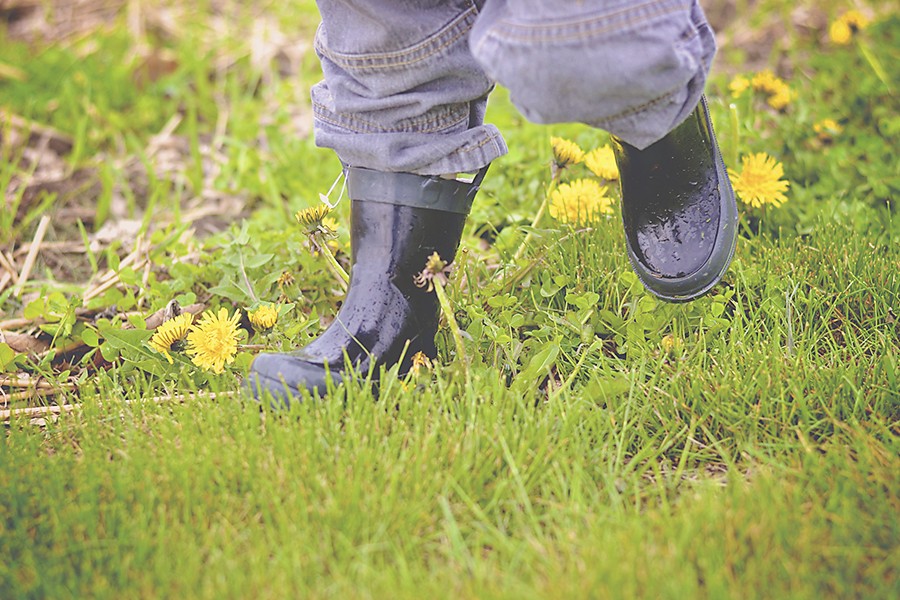
My son absolutely loves wearing his rain boots around the house (usually without anything else) and always begs to go outside to play in the rain. This picture makes me so happy because although I cannot see his face, I can totally “feel” how happy he is stomping around outside in his rain boots.

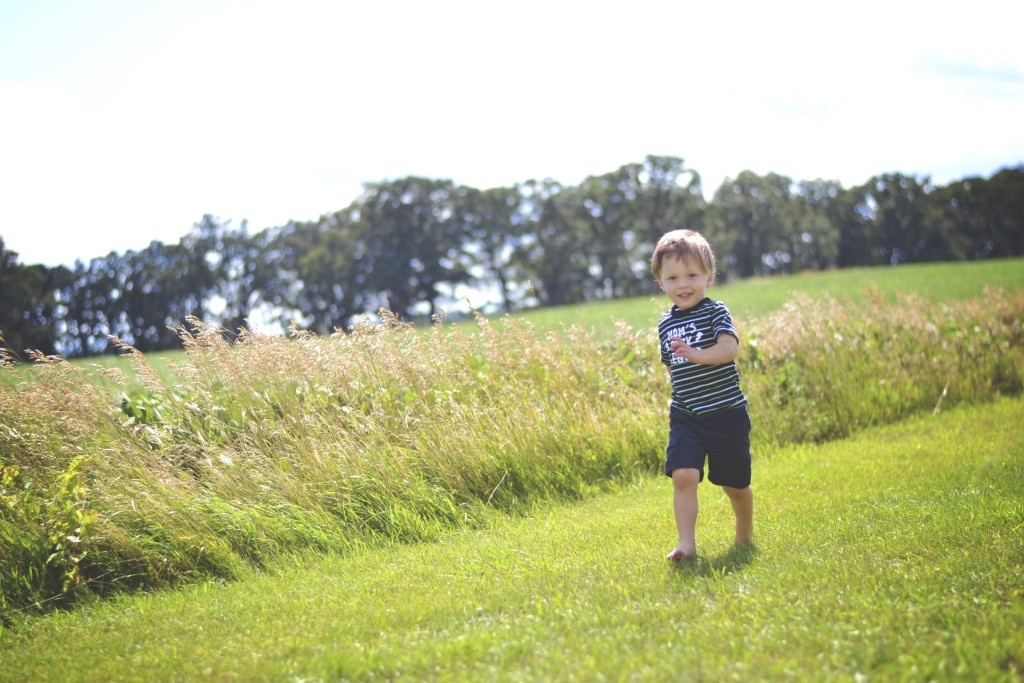
This picture was taken on mother’s day this year after my son and I went on a special walk at sunset. He was in his pajamas and despite the fact he had no shoes on I let him run around in the grass for a few minutes when we got to a pretty spot. This pictures says so much to me about that special time with him I will cherish it forever.
4. Watch the Light: Good lighting can really make or break a picture and there are many photography tutorials and articles that focus extensively on this subject. However, for our purposes there are a few basic things you can learn about lighting that will dramatically improve your pictures. Summer time is of course a great time to get outside to take pictures of your kids. However, with the longer days and warm weather comes bright sun and harsh shadows. These two factors do not make for the best pictures. In fact, overcast days are ideal for shooting outside pictures because colors stay true and your subjects won’t be squinting instead of smiling. Many photographers like to photograph during what is called the “golden hours” – the hours right after sunrise in the morning and right before sunset in the early evening because this time of day nicely lights your subjects and creates a warm natural glow. However, as a parent, I know very well that taking pictures during this limited window of time is very hard with kids. So what can you do if you want to take pictures in the middle of the day? The key is looking for open shade. Basically you want your subject out of the bright sun in a shady (but not too shady) area facing towards the light. This will help give you nice even skin tones and a better overall result. This topic can get a bit technical so if you are interested check out this article for some great pointers and examples. http://photographersconnection.com/just-what-exactly-is-open-shade/
This picture was taken right smack in the middle of the afternoon on a particularly sunny day. I simply could not find any open shade but my son was running around and having so much fun I knew I wanted to get the shot regardless. I started off on his right side but quickly noticed some harsh shadows falling on his face. By moving to his left side I was able to get a much more flattering picture of his face. So although it isn’t the best lighting, I am happy with the results nonetheless. So my tip is this when faced with some tough lighting – take a little test drive around your child and see where the light is falling on their face. Keep moving them (or you) if need be until the light is falling at the most flattering spot possible.
Now let’s talk for a minute about taking pictures inside. When taking pictures indoors, as tempting as it is to use your flash, I would first try to find the most natural light you can from your window source. Spend some time watching where and when the sun comes into your home for a few days and figure out the best spots to use for natural light. Open up your blinds and curtains. As I said above, our master bedroom and guest bedroom have really great natural ight in the morning so I use those locations a lot to take picture. I like to position my subject facing the window (such as near a window or an open door) at a 45 degree angle while I stand in the doorway or as close to the window as possible to actually take the picture. I often use the area near our sliding glass doors in our kitchen to set up my photo shoots because the light is so great. By positioning your subject towards the light source, you will also get a nice little sparkle (also called a catchlight) in their eye which really helps make your picture feel alive and bright.

So there you have it. A few tips and tricks I hope you can use to take some better pictures of your kids. If you are interested in this topic I would highly recommend checking out the book Mamarazzi: Every Mom’s Guide to Photographing Kids by Stacy Wasmuth. It is a wealth of information and is very easy to read and understand. You can also finds tons of great articles and easy tutorials on pinterest. Next month I will share a few more tips and tricks so be sure to stay-tuned.


")


These are some great tips! thanks for sharing 🙂
These are great-thanks!
Great tips, Kara. I’m siting in front of my new window thinking of the possibilities! We miss you in NY. You always too beautiful pictures of my children!